Recording Attendance for Activities
Your Activities and People data is looking great. Now what? Let’s take Attendance!
The Attendance tool in Empower equips you to get a real picture of who is where and when. Where are the lulls in attendance? What are the highest attended classes? Who is serving too often? The data that helps you lead your congregation.
There are a couple of ways that Empower helps you take Attendance of Activities. If you haven’t already, make sure you’ve set up the Activities you’d like to take attendance.
Check-In
One of the methods to take attendance is to utilize the Check-In portal. Check-In allows you to take attendance and print security tags instantly and see a real-time overview of who is where. Remember, to use Check-In the Activity must be set to show up in Check-In. For more information on using Check-In for attendance, see the Using Check-In support article.
Attendance Page
From the Attendance page (Membership>Attendance), We will take attendance on any Activities that we have set up. This is the method that we’ll take a look at below.
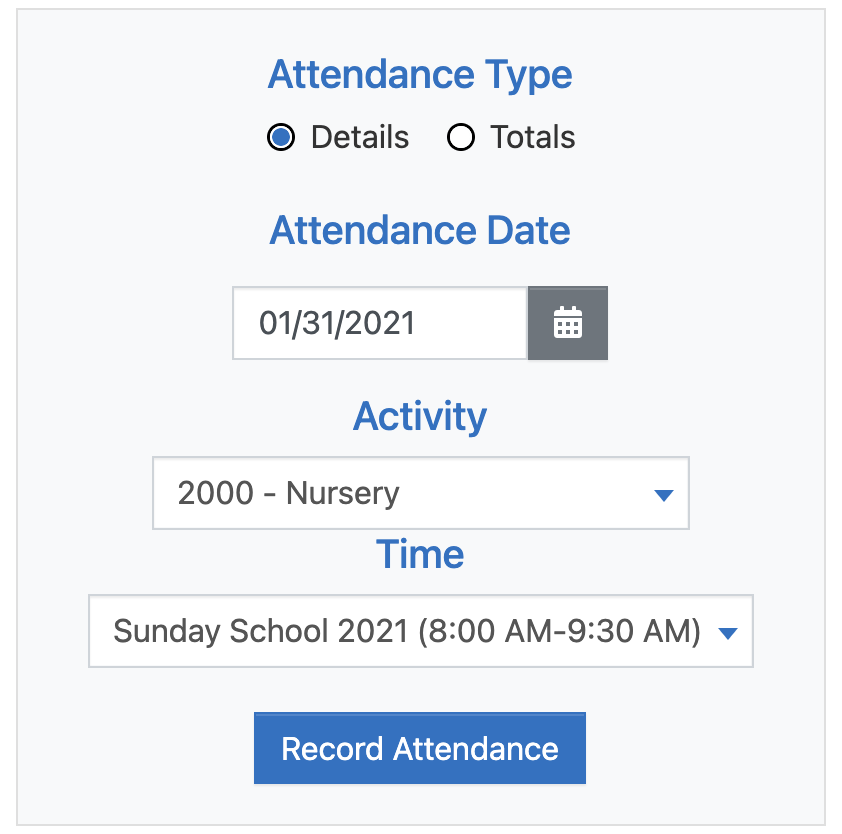
To take Attendance for your Activity, navigate to Membership>Attendance page. Clicking through to the Attendance page will bring up the Attendance Activity Selection screen.
This prompts you to choose the Attendance Type you would like to record:
-
Details - allows you to select People by name and toggle their status with one click.
-
Totals- allows you to input a single number for each activity.
When you create your activity, you MUST select the type of attendance record you would like to keep. (There’s more information on that here.)
You can always edit the desired attendance type by clicking Membership>Activities>Setup>General profile field.
Next, you will select the Attendance Date by clicking on the calendar icon next to the date (defaults to today’s date).
If you have selected Details for the Attendance Type, you will see Activity below that.
Select the Activity from the drop-down menu (only activities with Details Attendance Type will be listed).
If you are recording attendance for a date on which an Event occurred (associated with that particular activity), there will also be a drop-down menu for the Event Time.
You’re then ready to Record Attendance!
Recording Attendance (Details)
After choosing to Record Attendance, you will see a screen that looks similar to this:

Every member currently assigned to that Activity should appear on this screen.
They can be organized alphabetically or grouped by Household.
Next to each member’s name is a toggle box. Selecting that box will mark them present for the selected Activity and date.
In the top-right corner, the Select All and the Deselect All buttons allow you to toggle all of the names on or off with just one click. Remember, this will reset any manually selected members.
If you cannot locate an Attendee quickly, you can type their name into the “Filter displayed activity members” field. This will search and display only the matching members.
If you have additional attendees that are not (and you don’t intend to be) in the system, you can choose to add them in the Additional Number Present field. This assures that the total number of attendees is correct, even if you do not have the details for every person.
It can also be helpful if you are interested in tracking the leaders of an Activity in detail, but the total number of attendees. For example, we will record the key staff and leaders by name for Sunday Morning Worship, but we will keep track of total attendance by adding them to the Additional number present. This provides a hybrid of Detail and Total Attendance methods.
If you do not see a member that attended, there is an +Add Attender button in the top-right corner.
Adding an Attender
It’s our hope that your Activities are growing, you’re having guests come, and you’re reaching new people at every Event. Let’s talk about using the +Add Attender button. Clicking the button will open a pop-up window that walks you through the process.
This will be very similar to the process of adding a Household (you actually have the option to select a current Person/Household or add a new Household directly from this screen).
Enter the name of the person(s) that have attended. If that person is already in the system (or appears to be) Empower will catch it and ask if it matches an existing household.
If it does, select that household and continue. It will give you the option to edit the Household details as needed before adding them to the current Activity.
If the new Attender does not belong to an existing household, select Register a new household and click Next.
It will walk you through the steps of adding a new Household, and you will then be able to add that person to the activity.
Recording Attendance (Totals)
To record Totals only, simply select Totals and the Attendance Date and click on the Record Attendance button.
In the bottom left corner of the screen, select the activity that you would like to record attendance for and then click the Add attendance row for activity button.

Remember, this will only display those events that you have selected Totals for attendance tracking when you created the Activity.
After clicking to add the row, it will display the attendance row.
Under the No. Present column, there is a counter field. You can tab up as you count or type in the total number in attendance in the field.
Be sure to click Save when you are finished.
For related information on Attendance, see the following support articles: